Grids

The Insert Grids commmand makes it easy to create modular grids for laying out web content, similar to the Modular Grid Pattern generator or the 960.gs CSS framework. Select the desired number of columns, their widths, gutters, and so on, then click OK to insert a visual grid to help lay out your page elements.
Insert Grid dialog
When you run the Commands > Grids > Insert Grid command, a dialog will open, which lets you specify the grid properties that are described below. If you click OK, a layer called Grid will be created at the top of the layer stack, if necessary, and a bitmap representing the grid will be inserted on that layer.
You can drag the Grid layer to another location in the Layers panel if you’d like the grid to be below your content. This layer will be reused the next time you update the grid on the current page. If desired, you can share this layer to the other states on the page.
Note that any existing grid will be deleted and replaced the next time you open Insert Grid. If you’d like to have multiple grids on your page, insert one, change the name of its layer to something other than Grid, and then run the command again.
The name of the grid bitmap indicates the settings that were used to create it. So a bitmap named Grid: 10 col, 60/20/20/4 is 10 columns wide, with 60px columns, 20px gutters, a 20px baseline and 4 baselines per vertical module. Those settings are also stored on that grid bitmap, so the next time you reopen the dialog, you’ll see the last settings you used on that page.
Measurements
In the Measurements section of the dialog, you can control the column layout by entering the desired column width and gutter (the space between columns), in pixels. Then you can specify the number of columns. The non-editable Page width field will update to show the calculated width of the grid you’ve specified.
Note that the Insert Grid command creates only as many whole columns as will fit in the document at its current width, so you may end up with fewer columns than specified in the Columns field.
The Baseline field controls the spacing between the horizontal red lines. Enter 0 here to not draw any horizontal lines.
The Baselines/mod field specifies the number of baseline rows per vertical module. If you enter 4, for instance, then every 4th row will be drawn with a light pink color. Enter 0 to not draw any such rows.
In any of the numeric entry fields, you can press up-arrow to increment the value by one, or press shift-up-arrow to increment by 10. Pressing down-arrow does the reverse.
Grid Bitmap
By default, the grid starts at the document’s origin. If you’d like to have some blank space on either side of the grid, you can change the X-origin field. To leave space above the grid, enter a non-zero value in the Y-origin field. Note that the grid always extends all the way to the bottom of the document.
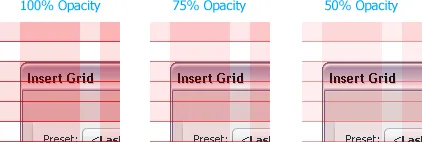
The grid bitmap is semi-transparent by default, but you can make it more transparent by reducing the value in the Opacity field.
Normally, the grid starts and ends with a column. If you’d like to start and end with a gutter instead, click the Start/end with gutter checkbox.
Guides
The bitmap that the Insert Grid dialog creates makes it easier to visually align your elements, but it doesn’t help you snap the elements to the grid while dragging. To add guides that correspond to the columns and rows of the grid, select the Vertical guides and Horizontal guides options. You can hide and show these guides using the View > Guides > Show Guides menu option.
Presets
The last settings you used are always remembered the next time you open the Insert Grid dialog, represented by
The presets are stored as .json files in \Users<yourID>\Adobe\Fireworks CS6\Commands\Grid Presets on Windows, or the equivalent user path on OS X. To move a preset to another computer, just copy these files to the corresponding folder on the other machine.
Previewing the grid
In Fireworks CS6, a Preview button will appear at the bottom of the dialog. Clicking this button hides the current grid, if any, and renders a new one with the current settings. You can also press shift-enter when a field has keyboard focus to preview the grid.
If you click Cancel after previewing a grid, the previous grid is restored.
This button is not shown in earlier versions of Fireworks due to an application bug that would cause a modal dialog to pop on top of the Insert Grid dialog, rendering Fireworks unresponsive.
Toggling the grid layer
To easily show or hide the layer that contains the grid bitmap, you can run the Commands > Grids > Toggle Grid Layer command. Adding a keyboard shortcut to this command will make it more convenient.
Note that you can actually use this command to toggle the visibility of any named layer. Just make a copy of the Toggle Grid Layer.jsf file and rename it. You’ll need to replace Grid with the name of the layer to toggle, such as Toggle Background Layer.jsf to affect a layer named Background.
Changing the grid’s color
By default, the grid bitmap is a semi-transparent red color. You can easily change the base color to something else by applying some filters. Unlock the Grid layer and select the grid bitmap. In the Properties panel, first apply a Convert to Alpha filter. Then add a Color Fill filter and choose a new color in that filter’s properties dialog. The next time you update the grid settings, those filters will be applied to the new grid bitmap.
Release history
- 0.2.0
- 2013-01-20: Added the option to start and end with a gutter. Added shift-arrow handling to increment/decrement by 10. The grid settings are now stored on the grid element.
- 0.1.1
- 2011-05-04: Increased the maximum allowed value for the numeric fields.
- 0.1.0
- 2011-04-23: Initial release.